Monday, December 31, 2012

Merry Christmas Casserole

I love traditions. In fact, I don't just love them, I'm very militant about them. Like when we were driving up to my parent's house near Seattle from our Portland home, and Matt mentioned our stockings.

"Wait, did you forget to pack the stockings?" he asked, and I could see them hanging from our fireplace, and the thought crossing my mind--I need to remember to throw those in the suitcase--before forgetting all together.

"Not the stockings!" I cried out, mentally kicking myself in the knees. The same stocking I had woken up with my whole life, which in almost 10 years I had never, ever forgotten to pack, now would spend Christmas morning empty and alone.

If we weren't almost to Kelso, I probably would have turned back.

So when my parents suggested that we eat Christmas breakfast before we opened presents this year, when every other year our breakfast was after, I almost freaked out. This is not how things are done! Everyone pointed out that I'm way too anal retentive. I had no case to argue back.

But the tradition of a new breakfast casserole recipe (though the great Breakfast Enchilada Casserole recipe was so good it stuck around a few years) slowly mitigated my frustration. This year was a recipe from Mom's favorite bakery authority, King Arthur Flour. It's a freaking biscuits, gravy and eggs casserole. How the hell do you get any better than that? (Well, you can see that little bottle of sriracha poking out in the corner of the picture.... and Mom's collection of Fiestaware somehow makes everything taste better). Breakfast was delicious with a new Christmas casserole winner crowned, I actually got the recipe, and all of the presents were just as nice to open while not on an empty stomach. In fact, just maybe I can be convinced to follow the same schedule next year. Now that it's established and all. As long as I have my stocking back.

Perhaps a good new year's resolution would be to try and be less of a control freak. But then I would be less me. And that simply won't do.

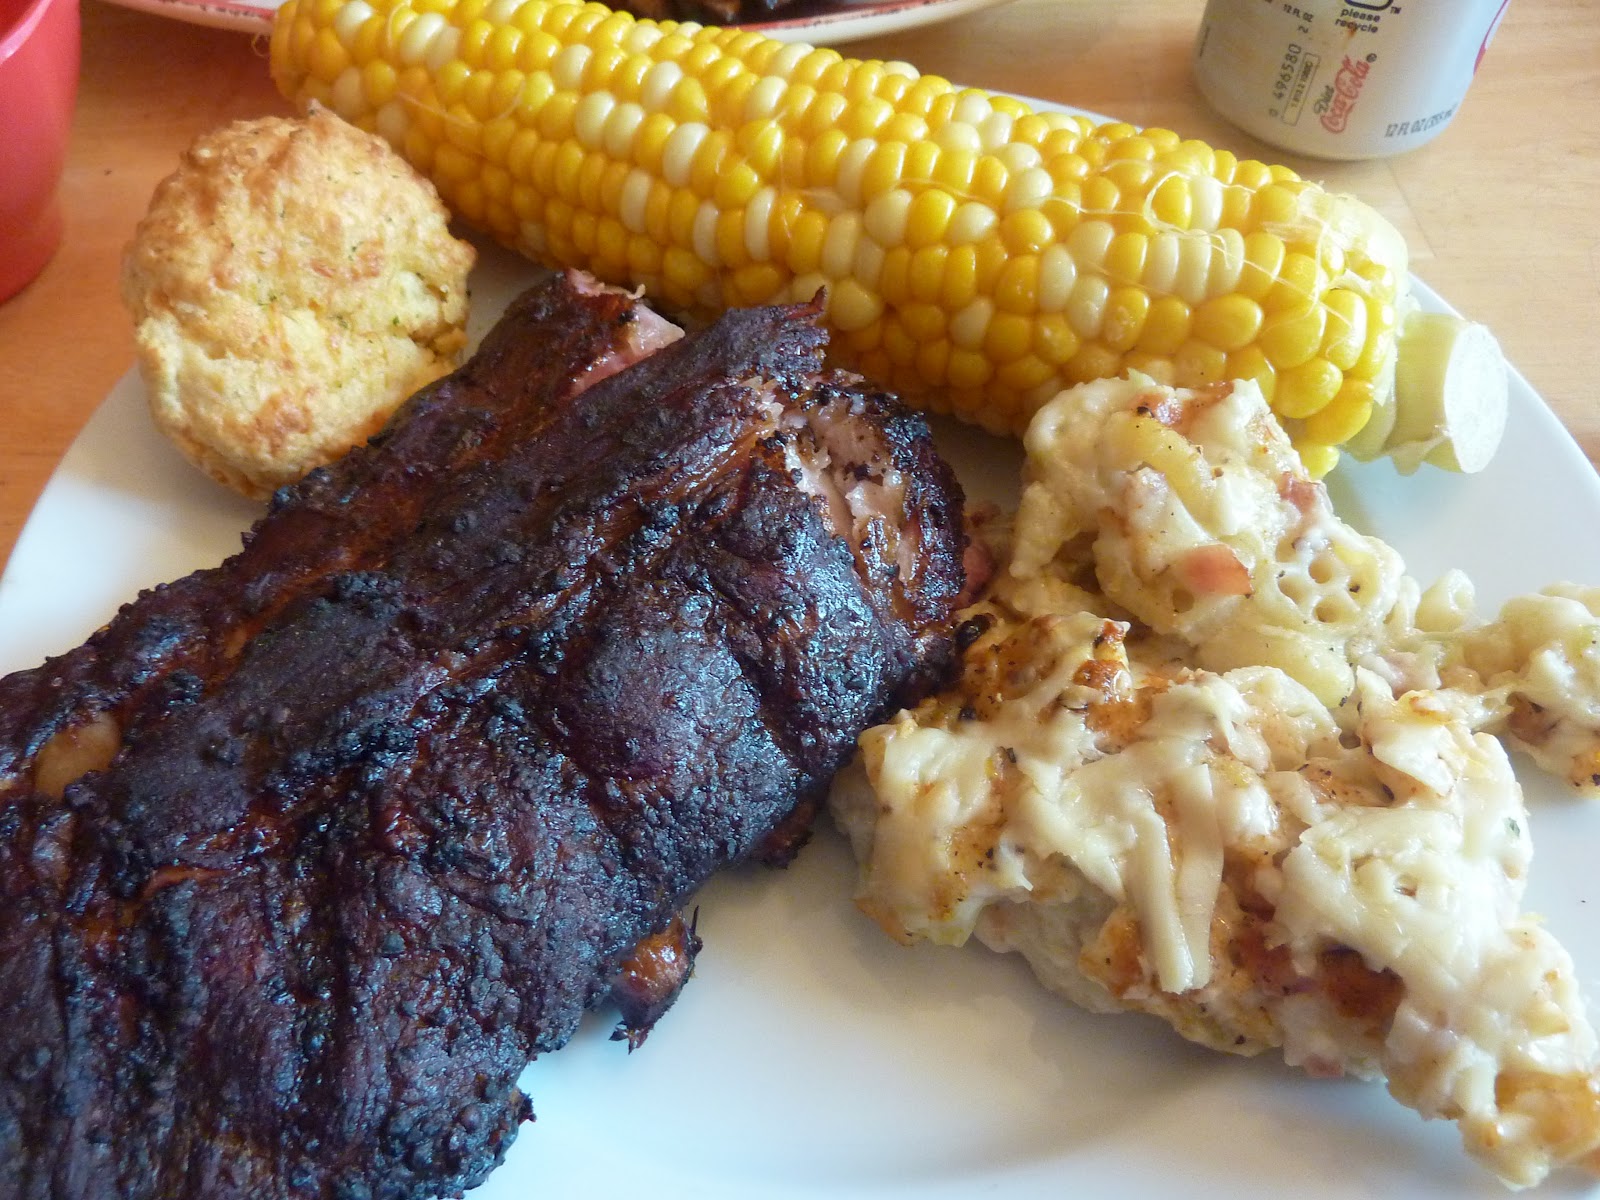
Christmas 2012 Sausage Biscuit Breakfast Casserole

Biscuits:

6 tablespoons ( 3 oz) cold butter
3 cups (12 oz) unbleached self-rising flour
3/4 to 1 lb bulk breakfast sausage, cooked and drained:  save the fat and don't wash the skillet
3/4 to 1 cup (6-8 oz) cold buttermild or milk

Sauce:

2 tablespoons (1 oz) butter
2 tablespoons ( 1 oz) reserved fat from the sausage above
1 cup (5 1/2 oz) onions ( I had to leave this out due to onion haters in our family)
1/2 (2 1/2 oz) unbleached flour
3 cups (24 oz) milk
1 bay leaf
1 teaspoon parsley
1/2 teaspoon thyme
1/2 teaspoon ground sage
ground fresh pepper

Casserole:

1 to 2 cups cooked vegetables (optional- suggestions were broccoli, red and green pepper, spinach etc)  
8 large eggs, hard boiled- no more than 10 min, peeled and cut into quarters.
2 cups (8 oz) grated cheese of your choice- pepperjack, cheddar or mixed-divided.

For 
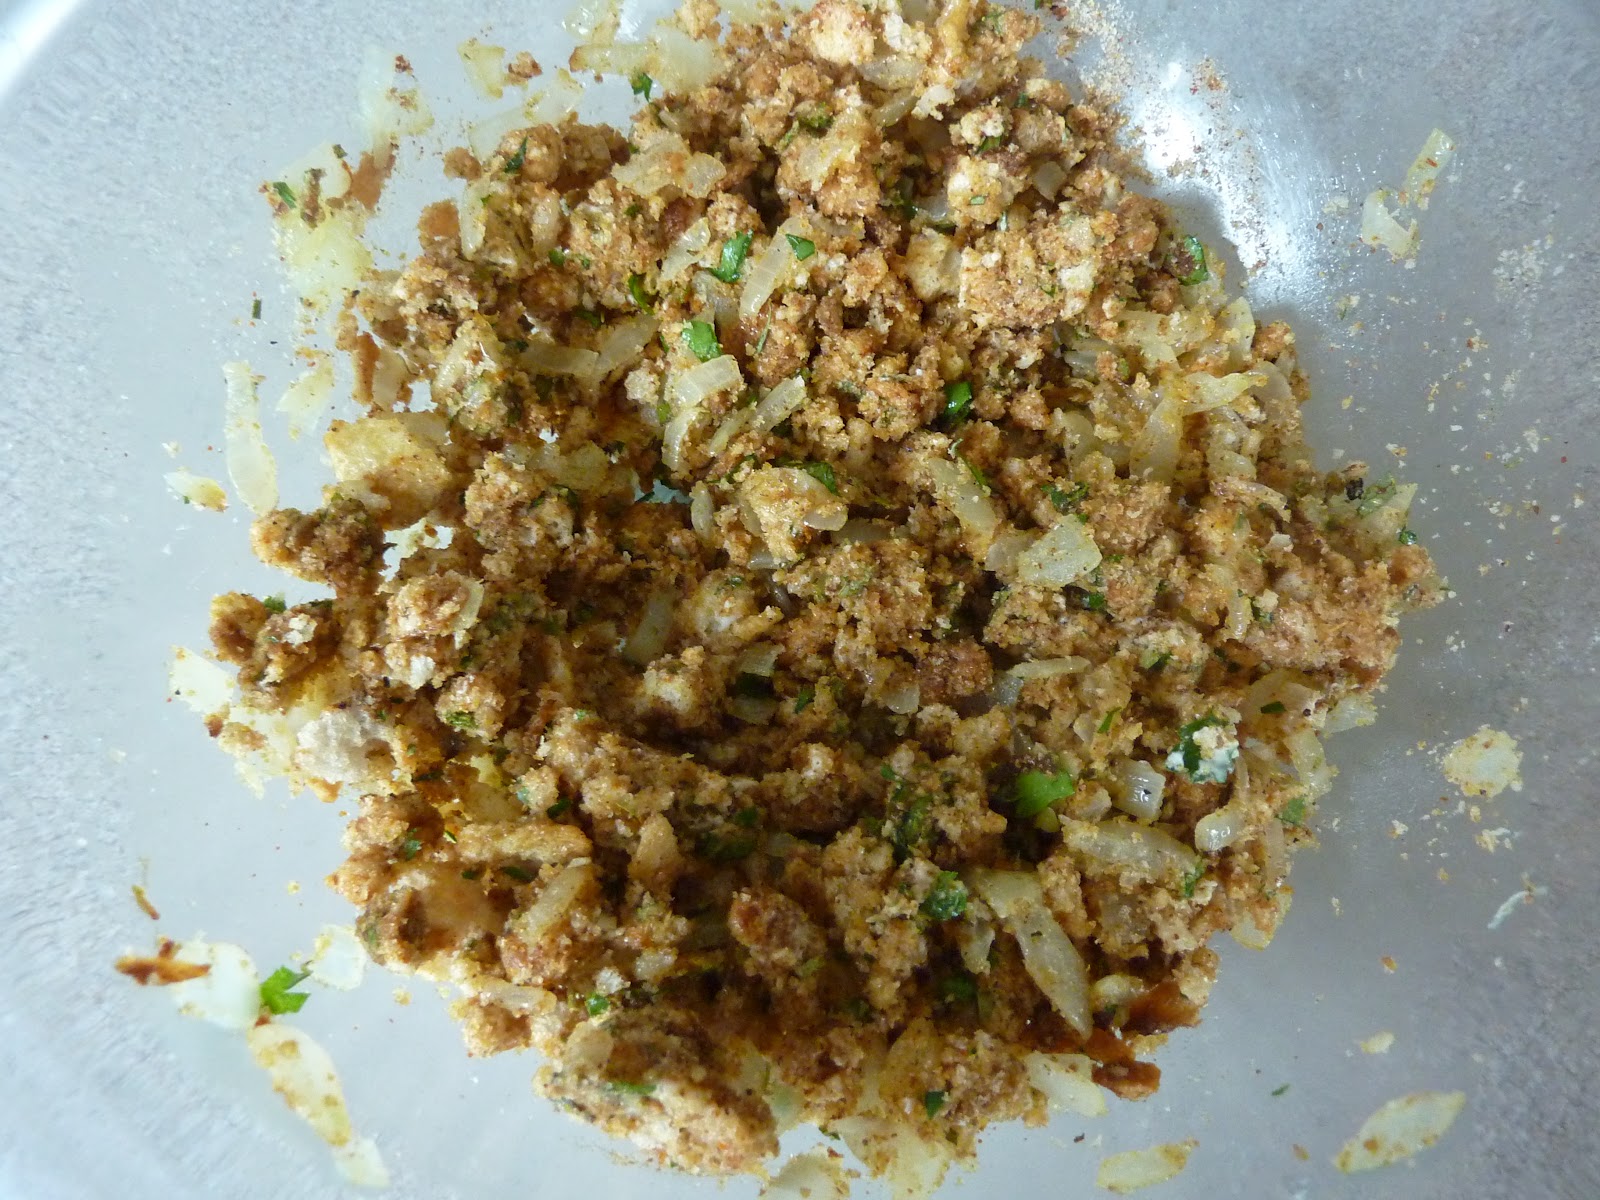
the biscuits, Cut the butter into the flour until its the size of small peas.  Stir in the cooked sausage.  Add the milk and stir until the dough comes together.  Turn it out onto a floured piece of parchment, pat it into a 1/2" piece with floured hands then cut into 8 to 10 pieces.  Pull the pieces apart so there's an inch of space between them.  ( You're going to crumble the biscuits anyway so no need to cut them.)  Bake for 12 to 14 minutes at 350 until golden brown.  Remove from oven and cool.

For the sauce:  In the same skillet the sausage was cooked in, melt the butter and add back 2 tablespoons of the fat from the cooked sausage.  ( If you don't have enough fat, increase the butter to 1/4 cup).  Add the onions and cook over medium heat stirring to scrape up any flavorful bits on the bottom of the pan.  When the onions are translucent, stir in the flour.  Add the milk 1/4 cup at a time, stirring between the additions until smooth.  When all the milk is in, add the bay leaf, parsley, thyme, sage and several healthy grinds from the peppermill.  Bring the sauce to a low simmer and cook, stirring occasionally, for 10 to 12 min.  

To make the casserole:  Butter a 3 quart casserole.  Break up half the cooked biscuits and spread them evenly in the bottom of the pan.  If you want to add any other vegetables, sprinkle them over the biscuits.  Place the cooked eggs over all next, then pour the sauce on top.  Sprinkle the sauce with the grated cheese ( you can do half the pan with pepperjack and other half with cheddar).  Crumble the remaining biscuits over the top.  

To bake:   If you're making the casserole ahead, cover and refrigerate for up to 24 hours before baking.  Bake in a preheated 350 oven for 45 min, right from the fridge.  If you're baking right after you assemble the dish, it will be done in 30 min.  Remove from the oven and serve warm.  

Yield 12 servings ( or 5 if its our family) - haha! Note from mom. Love her. Seriously though, you'd have to be some skinny little bird-eaters to stretch out  to 12.


Thursday, November 29, 2012

Iron Chef Leftovers Breakfast for Dinner

Question: do you think holidays were invented so we got to play around with leftovers? The answer is no. But damn I get a kick out of it. This year was an extra challenge of what to do with all the damn food in my house, because Matt took off so quick after Thanksgiving. Re-purposing all the sides and appetizers into decent meals that I can slowly chip away at has taken an extra dose of creativity (and sadly, I didn't get creative enough to re-visit green bean casserole... RIP, cream of mushroom-soaked stringies).

But as I stared at the leftover stuffing, so delicious and yet so not appetizing all over again, I had a thought. Stuffing was just a few eggs away from being strata. They were practically cousins, my favorite breakfast dish and carby side. Worst case scenario I end up throwing what would end up in the garbage anyway back in there, and boil up some Kraft Macaroni and Cheese. Mmmmm, KMaC.

What, now I have no culinary cred? Whatever.

So I opened up the deli drawer and took out every strange odd and end I had from the appetizer round: deli salami sausage, a hunk of Sriracha Cheese Log, sharp cheddar. Mixed in with the stuffing, broken apart slightly in my hand (my stuffing was pretty crumbly, since I'm careful not to get it all soggy and Stove Top-like the first time around). A little garlic salt, some pepper, and into the casserole dish.

When it came out of the oven, a taste tipped me off that it had worked, but it still needed something. One addition to yank the spotlight away from the stuffing's sage, one of the most overpowering herbs you can chiffonade. My solution? A healthy dollop of homemade salsa, and the last of the real sour cream. Back to Light until Christmas... sigh.

Today for lunch I had leftovers of leftovers, which is basically Inception Leftovers. Pow.

Sorry this recipe is written so casually, but now that I'm here cooking by myself my habits have taken on this bizarre primitive forager quality.

Stuffing Strata
3 cups cold leftover stuffing
5 eggs
1 cup milk
1 cup's worth of miscellaneous cheese: goat cheese, cheese ball, shredded cheese, whatever's still hanging around
1/2 cup leftover salami, bacon.... uh, I don't know. You could use turkey if you had to, but that wouldn't be my first choice
Salt and pepper to taste
Salsa and sour cream to garnish

Whisk together the eggs and milk in a large mixing bowl. Fold in the stuffing, breaking up as you stir. Stir in cheese and other leftovers you've collected. Season with salt and pepper and pour into a Pyrex baking dish. Bake at 325 degrees for approximately 50 minutes, turning once during the baking process. Served topped with salsa and sour cream. Watch American Horror Story: Asylum and get really annoyed about how they decide to turn this season toward. Click over to Jon Stewart and marvel about how he's just turned 50 and still is as sexy as he was when you fell in love with him in 2000 when he was making fun of Al Gore and Stephen Colbert was still his underling. Remember to rinse your plate when you're done.

Saturday, November 24, 2012

Thanksgiving Iron Chef Leftover Edition Round II

 
What an amazing Thanksgiving this year at the Blaneknhaus! Dare I say Best Tday Ever? Well, okay. I'll commit to that title. We've been prepping for days (weeks if you count the Pier One table linens!), and the holiday started at 6 a.m. when we got up to get the smoker going for the turkey. Lesson learned: just like with an oven, the "recommended" per-pound cooking time is grossly overstated. Next year we'll sleep in, since the supposed 11-hour smoke only took 6. Luckily we kept Ol' Smokey warm until dinner, where we were joined by longtime and new friends in what may be a new tradition--orphanage Thanksgiving. Nowhere else to go? Come to Hubbard!
Aside from the incredible, slow-smoked cherry and applewood turkey, there were some other fabulous recipe discoveries. Martha Stewart's Caramelized Onion and Bacon Dip was popular on the appetizer table, and the compound butter selection for the rolls was an everyday spoiler--why can't we have flavored butter choices everyday!? 

Instead of getting up before the sun for stupid Black Friday sales the next morning (or bailing right after dinner to follow this year's Screw Thanksgiving, Run Your Credit Card NOW GODDAMMIT marketing trend), we and our guests Brynne and Dan slept in, made spicy sriracha-cheddar waffles with apple butter syrup and bacon jam, and headed out for Willamette Valley wine tasting. I'm not sure how it started, but Black Friday's new haute snob tradition is wine tours the day after Thanksgiving. We battled wine limos and school buses full of tourists ("OMG we just HAVE to go to Erath!!") to visit Prive Vineyards and Anne Amie winery. We ended up in Carlton, an adorable-amazing, divinely-planned main street purely crafted out of tasting rooms and foodie boutiques. A half hour away, and I had no idea this oasis existed. Luckily there is still room in the world for holiday miracles.

One particular shop called out to me, as if the heavens had parted over its doors: The Republic of Jam. You know, dear readers, how much I cherish anything processed into a little jar. And this place didn't disappoint. Walls of creative flavors dreamed up and created in-house like Blueberry Syrah Black Pepper, Marionberry Sage, and Russian Plum (my new favorite creative condiment packed with a garlicky punch). I would have taken five of each, but I settled for the aforementioned Russian Plum and an Apricot Ginger.

Tonight, with a fridge overflowing with leftovers and a husband leaving for San Jose tomorrow (for a whole month!!!), I tried to use up as much as I could in the greatest Iron Chef Thanksgiving strategy there is: soup. I boiled the smoked turkey carcass to make a broth last night, and found a bag of Bob's Red Mill Grain and Bean Soup Mix in the pantry from my last visit. It's just dried beans, barley and other grains. Easy to recreate on your own--or even better, support the mission of Bob's Red Mill and buy a bag yourself! Don't forget a jar of Republic of Jam's Apricot Ginger. Balances out the smokiness of the turkey with a perfectly tart sweetness.

The result? A light dinner to balance out some of the post-pie guilt, and a pot's worth to freeze for some night where I don't have a smidge of the cooking motivation I just exerted this week. 

Smoked Turkey, Sweet Potato and Apricot-Ginger Soup
1 post-Thanksgiving turkey carcass (ours was smoked, but I'm sure a roasted turkey would be yummy to--albeit not as deeply flavored)
1 bag Bob's Red Mill Whole Grain and Bean Soup Mix (or three cup's worth of dried beans and grains of your choosing)
2 cups leftover Thanksgiving sweet potatoes
1 jar Republic of Jam Apricot Ginger jam
2 tbsp red curry paste
3 cloves garlic, mined
Salt and pepper to taste

The night before soup night, place the whole turkey carcass in a large Dutch oven or stock pot. Cover with water, bring to a boil, and then simmer for 4-6 hours. Cool, then fish out the bones and any unwanted skin/fat/gristle. Leave the meat in the broth, and add the beans and grains. Cool to room temperature, then refrigerate overnight.

Place the pot on the stove at least 4 hours before planning to eat. Add sweet potatoes, jam, curry paste, 3 cloves garlic, and salt and pepper. Stir and slowly simmer. Allow to simmer and marinate flavors for 4-6 hours, then serve with leftover rolls. I garnished the pretty bowl above with some leftover parsley and pepitas (pumpkin seeds I bought for a recipe I didn't end up making).

Sunday, November 4, 2012

Craving Cacciatore

Can YOU remember the last time you had chicken cacciatore? I can't. I think I made it 100 years ago in my first apartment while I was making my way through my only cookbook, the Betty Crocker New Cookbook (of the checker cover and three-ring binder style). Ahh, I still remember the peanut butter noodle night that I insisted was delicious.

It was not.

Anyhow, the cacciatore I made back in the day was gross in multiple ways. Most importantly, leaving the skin on the chicken. During the slow braise it turns jello-like, never developing any sort of crust or crispiness necessary to making chicken skin palatable. The results were soggy pieces of chicken on noodles that were probably undercooked. Long story short, I haven't made the stuff in seven years.

But the thought of warm, lightly spicy chicken stew ladled over spaghetti has been tantalizing the back of my brain for a few weeks. Yesterday, with some terrible white wine in the fridge I've been wanting to use up, I decided to pull the trigger. I switched up this 1960's sort of recipe with the addition of sweet-heat Peppadew peppers, which livened up a sea of wilty bell peppers. Served with fresh baked bread, this warm and comforting dish was redemption from the awful sins of my cooking past.

Chicken Cacciatore
Olive oil
1 fryer chicken, cut into pieces and skinned
1 large onion, sliced
2 cups cremini mushrooms, stemmed and sliced
Salt and pepper to taste
2 sprigs rosemary
1 chiffonade of fresh basil
1 tsp dried oregano
1 tsp dry red pepper flakes
2 cups tomato sauce
1/2 cup white wine (plus additional for deglazing)
1/2 cup water
1 red bell pepper, sliced
1 yellow bell pepper, sliced
1 cup Peppadew peppers, sliced

1. Preheat the oven to 350 degrees.
2. Heat olive oil in a large Dutch oven over medium-high heat; add salt and pepper seasoned chicken and cook until browned on the outside. Remove to a bowl to capture the juices.
3. Stir in onions and mushrooms and deglaze pan with a splash of white wine; cook for 5-6 minutes until soft. Add a big pinch of salt and pepper. Stir in garlic, rosemary, red pepper flakes, oregano, tomato sauce, wine and water.
4. Place chicken pieces and any juices that have accumulated in the bowl on top of the cooked vegetables. Add more salt and pepper. Place pepper slices on top of the chicken.
5. Cover and cook in the preheated oven for 1 hour 15 minutes.


Monday, October 22, 2012

Chicken, Cheddar and Checkers

For my birthday, I really wanted a new camera. My gorgeous Panasonic Lumix met a premature end this summer, and I've missed it like crazy. I've turned into an Instagram addict trying to salvage my crappy iPhone shots in the meantime. But replacement cameras are horrendously expensive, and I spent a LOT the last few weeks on nylons and pencil skirts. It's fall, after all. So I told Matt to get me something cheaper as a gift.

The result? WAFFLE IRON.

I have been wanting a waffle iron for three months, ever since describing this dream dish to my friend Lisa over cocktails. "I'm craving these cheddary, spicy waffles, with fried chicken and maple syrup." As I'm a PNW girl to the Puget Sound salty bones, I've never had the combination of crispy chicken, sweet waffle and maple syrup.

Scratch that. I DID have chicken and waffles at Skillet in Seattle last year. An almost-crepe, spiced fried chicken, arugula, and a peppery dressing. That was delicious. And now that I think about it, the root of my deep craving.

But it's nothing I've made before. I failed to register for a waffle iron when we were getting married, as I was distracted by Crate & Barrel's glassware department. Now that sweet and savory waffles are becoming en vogue, I feel awfully left out.

So! Tonight, I tried out the recipe that was gestating in my brain. I followed the manual instructions, avoiding the temptation to overfill the little squares. Matt was especially skeptical, as per usual.

Then we ate them. And I squealed with pure, serendipitous joy. Sweet! Salty! Crispy! Cheesy! Spicy heat! All of the very best sensations that can hit a tongue in one single bite.

Don't have a waffle iron? Go! Get one! So much happiness is to be had in your life! Got one? Get that paperweight out of your cabinet--it's not just breakfast anymore, bitches. Savor-y your waffles!

Cheddar-Sriracha Chicken and Waffles
4 chicken strips (I know, I lazed out. But it's a Monday, and I used the nice organic Panko-breaded kind. Still not good enough? Fry up some chicken, then.)
2 1/2 cups flour
4 tbsp sugar
2 tsp baking powder
1/2 tsp salt
3 eggs
2 cups milk
1/2 cup vegetable oil
1/4 cup King Arthur Flour Vermont Cheddar Powder (don't have this in your pantry? Poor thing. In case of emergency, rip open box of Kraft Macaroni and Cheese and use the packet.)
1/2 cup shredded cheddar cheese
1 tsp dried jalapeno
1 tsp sriracha (plus more for serving)
2 green onions, diced
Maple syrup for serving

Bake chicken. In meantime, make waffles.

Sift together flour, sugar, baking powder, dried and regular cheese, jalapeno and salt.

In a bowl, beat the egg yolks, add the milk, oil and sriracha and then add the sifted dry ingredients. In a small bowl, beat the egg whites to a thick foam and add them gently to the dry mixture. Cook waffles according to maker instructions.

Serve waffles topped with chicken, sriracha, green onion and maple syrup.

Sunday, August 12, 2012

Feel the Sizzle

Quick cook test! Two All-Clad pans. One just came out of a 450 degree oven, the other's been gently simmering on the stovetop. Which is which?

I failed this test earlier this week, while I was making Chicken with Roasted Tomato Sauce from Bon Appetit's August issue. The one with the luscious sliced heirloom tomatoes all over the cover. The multi-step brown-on-the-stovetop, roast-in-the-oven recipe required a pan that could take the heat from any angle on the stove. This is why my All-Clad pans are one of my most treasured items in our kitchen: no wood, no plastic, nothing that gets in the way of going into any heat source. Except the microwave, but let's not be stupid here. I'm getting to the stupid part.

After I browned the chicken in olive oil (I used leg and thigh quarters instead of the recipe's yawn-y boneless-skinless chicken breasts; they have more flavor, and the only difference is a couple minutes longer in the cooking time), I stuck them into the high-heat oven to cook through. After they came out the pan was needed back on the stovetop to de-glaze with balsamic vinegar and burst the cherry tomatoes. I removed the chicken and quickly became distracted: a salad needed croutons, Matt wanted to show me something funny on YouTube. When I turned back to the stove, I reached for my pan to turn and start the sauce...

SSSSZZZZZZZZZZ!!!

"OH MY GAWD!" I screeched, bit by a nuclear-hot pan in disguise. The sound of my skin baking made me want to vomit. Yes, this is a familiar sensation. I am a burn queen, starting with my first knuckle burn. It was my three-week stint working at McDonald's when I was 16, and I was flipping breakfast sausage patties on the skillet. Lifted my hand too high, and it nicked the super-hot oven top thing that folds down to speed cook the meat. Then there's the Great Texas Toast debacle, Pasta-pocalypse...

I might be slightly clumsy. Just a teensy bit.

I'm also a huge wiener. "Maybe we should go to the hospital," I whimpered, watching my right hand fingertips balloon in blisters.

"You'll be fine," Matt promised. This from a man who was practically unconscious with pain last October before he let me call an ambulance. But with Matt's sous assistance I brought the dish to the table, sauce and all, and it was gorgeous. Most highly recommended, as long as you remember oven mitts. The sauce is a versatile, tangy fusion of grassy olive oil and the tomato's delicate sweetness. Would be just as good on halibut steak. Crusty bread is a must with this. You don't want a drop of those juices going to waste.

Oh, and as for my burn victim recovery? Back to normal, except for a particularly gnarly burn blister behind my ring finger. Another scar for the books.

Chicken with Roasted Tomatoes and Herbs
from Bon Appetit
  • 1 1/2 pounds cherry tomatoes or other small tomatoes on the vine
  • 6 tablespoons olive oil, divided
  • 2 tablespoons herbes de Provence
  • 1 teaspoon kosher salt plus more
  • Freshly ground black pepper
  • 1 tablespoons Worcestershire sauce
  • 1 pound skinless, boneless chicken breasts (I used leg and thigh quarters instead)
  • 1 small shallot, minced
  • 2 tablespoons red wine vinegar
  • 3 tablespoons flat-leaf parsley leaves (I used basil instead, since it was on my counter)
  • 3 tablespoons fresh tarragon leaves
Preheat oven to 450°F. Combine tomatoes, 2 tablespoons oil, and herbes de Provence in a large bowl. Season with salt and pepper; toss to coat. Heat 1 tablespoon oil in a large heavy ovenproof skillet until oil shimmers. Carefully add tomatoes to pan (oil may spatter). Transfer skillet to oven and roast, turning once, until tomatoes burst and give up some of their juices, about 15 minutes. Transfer to a medium bowl and drizzle with Worcestershire sauce.
Meanwhile, season chicken all over with 1 teaspoon salt and pepper. Heat 2 tablespoons oil in a large ovenproof skillet over medium-high heat. Sear chicken on both sides until golden brown, 6–8 minutes. Transfer pan to oven and roast chicken until cooked through, 8–10 minutes. Transfer chicken to a cutting board and let rest for at least 5 minutes.
Add remaining 1 tablespoon oil to same skillet; heat over medium heat. Add shallot and cook, stirring often, until fragrant, about 1 minute. Deglaze pan with vinegar, scraping up browned bits from bottom of pan; add tomatoes and their juices and simmer until sauce is just beginning to thicken, about 1 minute. Season sauce to taste with salt and pepper.
Slice chicken; divide among plates. Spoon tomatoes and sauce over; garnish with herbs.

Sunday, August 5, 2012

When Not to Cook

This weekend, the Pacific Northwest hit 100 degrees for the first time this year. And I didn't cook. Part of the reason was that I went up to Seattle, and got cooked for by my mom (I know, be mad jealous). But the other was, it felt too hot to think about food, or want much of anything heavy.

The beautiful part of that conundrum (kinda hungry, totally hot, completely lethargic) is all of the ready-to-eat bounty slumping plump from the vines. Tomatoes, zucchini, cherries, apricots, peaches--the heat lasts only a few weeks tops, and so does the peak of the garden jewels, but at least they break together in a perfect natural moment.

While I was in Seattle I went to Metropolitan Market (like I almost always do), and they had all of the produce prizes in these cute little wooden baskets. I couldn't leave without a basket of sweet heirloom cherry tomatoes! Even though the sign said they were grown in Oregon, which probably means they were transported up to Tacoma's Proctor District from about a mile away from our house. The tomatoes in my own garden haven't quite yet popped. I figured they would work into just about everything I could make this week, including a roasted tomato and chicken dish from this month's Bon Appetit (stay tuned!).

This afternoon, when I got home, I sort-of unpacked. I took a nap. I didn't feel like touching the oven. So, when the Burgerville lunch I picked up wore off later in the evening, I used the cool, simple ingredients I had hanging around: tomatoes, a fat cucumber from the garden, and a can of delicious chunky tuna from the pantry. The result was tuna salad on pitas with hummus and cucumber dips.

Maybe it was the heat-induced insanity talking, but this was divine. The tomatoes were divine, and tasted like candies. The tuna salad was cool and tangy, spiked with the last of our bread and butter pickles from last summer. Next week will be time to can pickles again, as the steps and cycles of summer continue. We just seem a few steps closer to the earth this time of year. I love every moment of it.

Sunday, July 29, 2012

Plum Delicious

Dessert tends to get short-changed on Eats of Eden. It's all, OOH! LOOK AT THIS SIDE DISH!! or BEST ENTREE EVER!! To be honest, I don't make much dessert. Not that I don't love to bake, or that rich, sweet goodness isn't something I crave. But for one thing, dessert is hard to do 5 nights out of 7. It's hard enough to get dinner on the table getting off work at 5, let alone some after-meal extras. My mom used to simplify dessert and give us little dishes of applesauce with cookies or canned peaches for us, but I never think ahead that far. Along with that, I like being able to fit into my pants. Cakes and pies don't help with that cause.

"Oh but Tabitha, you could do some low-fat/sugar-free/low lactose baking..."

Yeah. And I could also gnaw on a piece of cardboard I drew a picture of a cupcake on. If I am going to take the time and the calorie hit to make and eat dessert, I want it to be as delicious and well-textured as possible.

This time of year is one of the best to make dessert. Even though the oven switches on, there are so many beautiful ingredients in rich bounty: get a pie craving in October and you'll end up paying $8 a pound for anemic cherries. Right now I'm in between what I'd like to can: the cherry pie filing and jams are already sealed up and in the garage, and it will be a few weeks before peaches and cucumbers will be in full swing. Raspberries are in their prime this weekend, so I went on Martha Stewart's website to flip through her seasonal slide show for ideas. It was here I found something I drool over every summer but have yet to make: upside-down cake. I've never been able to make it in the past because I didn't have an awesome springform pan (thanks, Annie!!). I sent Matt a grocery list (he decided to go to work Saturday, stupid overachiever), and he came back with dusky black plums, peak raspberries and a little box of blueberries.

"I thought they'd go good with what you've got going on," he said. And they were on sale. Nope, off-book from Martha's recipe, but I liked where his head was at. The fresh fruit was arranged over a caramelize-creating brown sugar top, and a simple batter was spread on top. I was sure to get a picture of the pretty fruit arrangement before the sloppy batter got in the wa, because some things, while delicious, are not so Pinteresting.

The cake baked while Matt prepped the smoker for Round Two, which our friends Brandon and Stephanie came by to help us devour. They also were around to take a good chunk of this cake which, while fresh and not overly-sweet, is sure not to keep long as a leftover in the refrigerator before getting soggy. This is a great recipe for sharing: or for those moments when you want to devour an entire cake by yourself. No judgment here. We also topped it with Cool Whip Lite, which I would also ask you not to judge me for (I didn't want to whip cream, okay? By the time the cake was in the oven, it was wine time! Pinot rose...).

The tartness of the raspberries and plums was the perfect foil to the sweet, buttery-light cake. A delicious collection of the best of this summer's moment. Somewhere between first-of-the-season peas and last-hurrah squashes, the end of July remains bittersweet.

Plum-Raspberry (and blueberry!) Upside Down Cake
from Martha Stewart Food

  • 10 tablespoons (1 1/4 sticks) unsalted butter, room temperature, plus more for pan
  • 1/3 cup packed light-brown sugar
  • 6 medium plums, halved and pitted
  • 1/2 pint raspberries (you can add an additional 1/2 cup blueberries to help fill in with the raspberries if you'd like)
  • 1 1/2 cups all-purpose flour
  • 1 teaspoon ground cinnamon
  • 3/4 teaspoon baking powder
  • 1/4 teaspoon baking soda
  • 1/4 teaspoon salt
  • 1/4 teaspoon grated nutmeg
  • 3/4 cup granulated sugar
  • 1 teaspoon pure vanilla extract
  • 3 large egg yolks
  • 1/2 cup sour cream

Directions

  1. Preheat oven to 375 degrees. Butter a round 8 1/2-inch by 2 1/2-inch springform pan; line with parchment paper. Melt 2 tablespoons butter; pour into pan. Using a sieve, sprinkle light-brown sugar evenly over the melted butter. Arrange plum halves cut side down on top of the brown sugar, squeezing in as many plums as possible to allow for shrinkage during baking. Fill in the gaps with raspberries; set aside.
  2. Sift together the flour, cinnamon, baking powder, baking soda, salt, and nutmeg; set aside. In an electric mixer fitted with the paddle attachment, cream the remaining 8 tablespoons butter and the sugar until light. Beat in the vanilla extract. Add the egg yolks, one at a time, beating well after each addition. Add half the flour mixture, and beat until combined. Beat in the sour cream. Beat in the remaining flour mixture.
  3. Spoon cake batter on top of plums and raspberries, spreading evenly with a small spatula. Place the pan on a rimmed baking sheet to catch any juices; transfer to the oven, and bake until a cake tester inserted into the cake comes out clean, 60 to 70 minutes. Transfer to a wire rack to cool, about 1 hour. Run a knife around edge of pan to loosen cake. Remove ring; invert onto a serving plate. Serve slightly warm or at room temperature.

Tuesday, July 24, 2012

Closeted Fetish

I may have mentioned this in the past: I have a sauce fetish. Simmer sauces. Marinades. Oils and vinegars. Spicy, tangy, sweet inspirations and possibilities bottled up for a bunch of theoretical parties I dream up and never have. I get sucked into the sale basket at Williams-Sonoma, the neat aisles at New Seasons, specialty vinegar import shops. If it's bottled and delicious, I just. Can't. Resist.

Which is kind of a problem, because I don't have infinite shelf space, and as much as I wished otherwise, sauces are not immortal. After a couple years they start to break down and get scary looking (a fact I just happened to discover when cleaning said pantry last month).

So I made myself a little mission for the week: use up some damn sauce! I had a lovely Williams-Sonoma barbecue braise sauce (marked down from $16.99 to $3.99... nice score, 2011 Tabitha!) I took out along with thin pork cutlets. Matt gave them a quick grill out the outside, and then they went for a quick braise in the oven, bathing in the deeply-flavorful barbecue sauce.

As I sat at my desk at work, working all day on a huge busywork project, I dreamed up a side: spicy crisp potatoes with a mustard and sriracha glaze. Um, yum! Hurry up, 5:00! I have had mixed results with making good crispy-roast potatoes, but what I've slowly learned through sad, soggy trial and error is that lots of heat and little movement is key. I sliced potatoes from the farmer's market, a mix of reds and Yukon golds, along with half a leftover red onion and tons of freshly-pressed garlic. I whisked Dijon mustard, sriracha sauce, olive oil and some of that wonderful pantry champagne vinegar to make a kind of vinaigrette sauce, which I poured over the potatoes.

"Are the pork chops in the oven?" Matt asked, sniffing at the savory air being endlessly circulated around our great room by the air conditioner. "Smells like bacon."

BACON!

The perfect last touch to my potato side: a touch of leftover bacon from hamburger night a few days ago. I topped each potato neatly with a dice, and stuck the pan in the oven at 425 for 35 minutes while the braised pork cutlets rested. The result? CRISPY, SAUCY POTATOES! Who knew? Crusty on the edges, a perfect, soft toothsome bite in the middle. The sauce dreams come true!

One down, fifty-two bottles to go..... Tangy & Peppery Moroccan Sauce, anyone?

Sriracha-Mustard Crispy Potatoes
4 medium-sized potatoes, red or Yukon variety, halved and cut into even chunks
1/2 red onion, thinly sliced
5 cloves garlic, minced
2 slices bacon, cut into 1/4" slices
1/2 cup olive oil
1/4 cup white champagne vinegar
1 tbsp Dijon mustard
1/2 tbsp sriracha sauce (or more, or less, to taste!)
1/8 tsp ground mustard seed
1/8 tsp garlic powder
Salt and pepper to taste
Handful of sliced parsley for topping


Preheat oven to 425 degrees.

Spread potatoes evenly on a baking sheet or stone so that no potatoes are touching. Sprinkle with onion and garlic.Top each potato with a bacon piece (or if you're not that anal and don't have to have bacon in every bite, just spread it wherever. Whatever, I can't police your kitchen.)

Whisk the oil, vinegar, mustard, sriracha, mustard seed, garlic powder and salt and pepper to taste. Pour sauce over potatoes, sprinkling with additional salt and pepper. Roast for 35 minutes without turning or flipping potatoes, although you can turn the pan around once in the oven halfway through cooking. Top with additional salt and pepper (potatoes need lots!), and fresh parsley.

Sunday, July 15, 2012

Atop Smokey Mountain, All Covered in Cheese

Remember that first season Simpsons episode when Homer bought Marge a bowling ball for her birthday? I may be accused of similar trickery when I bought Matt the Weber Smokey Mountain Cooker for his birthday, which arrived last week. A big barrel-style smoker that slow-cooks over wood and charcoal, the best-rated choice amongst those hardcore barbecuing enthusiasts who make such proclamations we should listen to. Did I want Matt to have a happy birthday? Of course. Was he thrilled? Naturally. But I really wanted some damn ribs.

Yesterday we (he) set up the smoker in the backyard, which once we get the grill back there from its garage winter home, will be the Outdoor Cooking SuperStation. Wait, wasn't TBS the SuperStation for a while? I seem to remember that dumb tagline. Since you invest a bag of charcoal, some nice wood chunks and the better part of a day into smoking anything, we decided to make the most of it and smoke on both racks: baby back ribs to eat for dinner, and a chicken for later in the week. I went on a rub bender yesterday at Whole Foods, and Matt brought back Texas rib rub from his trip to El Paso. I rubbed the meats down the night before our smoking so they'd have plenty of time to soak up the flavor infusions. And then get a big crazy dose of smokey! So basically, taste insanity.

It was a lovely day in Portland (and areas slightly further removed like Hubbard) yesterday. A little warm, but I fixed that by putting on my swimsuit for the first time in two years and running through the sprinklers. Smoking makes you stay outside, to ward off fires and make sure the temperature gauge doesn't do anything nutty, but this leads to all sorts of nice stuff like finishing the best book you've read in 18 months ("Tiny Beautiful Things" by Cheryl Strayed) and drink enough lemonade and vodka cocktails to make running through the sprinkler seem like a good idea. It truly is, by the way.

As the work kept chugging along outside, I went inside to make some side dishes. I got some fresh organic white-and-yellow corn during the spice rampage, and I was also planning on making some spicy macaroni and cheese. This is what I want to talk about a bit, because I can't tell you too much about making ribs. It's not so much a recipe thing as it is an equipment-and-technique sort of thing. But I can tell you about making the best freaking macaroni and cheese I have ever put together. It was inspired by the stuff they serve at Famous Dave's on their criminally-overpriced plates of barbecue. A little bit of rib, a cornbread muffin that's great, a meat portion that fits within Weight Watcher guidelines for skinny girls eating brisket, and if you so choose, a very small cup of some seriously delicious spicy mac. I didn't have the recipe, but I did have a few aces:


1. Cougar Gold
My little bro is heading in less than a month (!!!!) to move into his freshman college dorm at WSU in Pullman. Little Zach! The guy I left for Portland almost a decade ago with his mushroom haircut and Harry Potter Legos. Now he's all registering for biology and picking out shower caddies at Bed, Bath & Beyond. Hence time is cruel and I'm fucking old. WSU is a great university for quite a few reasons I'm sure, but not the least of which is its on-site creamery that makes the best cheddar cheese you will Ever. Taste. So piquant and flavorful, it doesn't get lost in dishes like some more pedestrian cheddars.

2. Secret Aardvark Sauce
What's in Secret Aardvark Sauce? Where do I find it? These, you see, are secrets.

Well, okay. I can at least help you find it.

Secret Aardvark is made locally in Portland, and is generally the most perfect hot sauce I've ever experienced. Not too spicy, never overly vinegar-y, just perfect heat that truly enhances anything it touches.

Forgive me sriracha, for I have sinned.

If you don't live in Portland, where it's sold at Whole Foods, New Seasons and other more locally-inclined purveyors, you can get as much as you'd like shipped right to your doorstep: www.secretaardvark.com/. Tell them Tabitha sent you. They'll have no idea who the hell I am, but they should still know.

3. Those little green smoky chiles in cans
You've seen these, right? Tucked in the Hispanic foods aisle at any grocery store you've ever been in? Screw you, canned chipotle. Culinary weaponry!

I made a bechamel for the macaroni and cheese while the noodles cooked--a half n half mix of elbow macaroni and wheels. Why the wheels? Because I challenge you to name a noodle that makes you happier. Also they have a strange quality to make me feel as if I'm eating something much more special than I am. Back in like 1990 when I was tagging alongside my mom at the grocery store, Kraft introduced blue box macaroni IN WHEELS! It was inexplicably way more money per box, but I used to request it all the time--"can we get the wheel macaroni?" Mom tried to logically explain that there was less noodle per box in this version, and it cost way more, but I still equate those noodles with sheer, exotic luxury.

After the sauce had thickened I mixed in the cheese, paprika, chiles and a little cayenne pepper, plus salt and pepper to taste. I topped the whole casserole dish with Secret Aardvark and leftover cheese, then let it cool until baking to serve alongside the meat.

Yes, the ribs were incredible. All applause and credit to Matt and Weber. But what I could not stop compulsively picking at, even though I had eaten far more than I should have already, was that crazy-good macaroni and cheese. I immortalize it here as much for my own benefit, to go back and make it for a hundred barbecues in the future, as for you, dear reader, to try.

Now if I could only make $30 a plate like Dave does...


Spicy Smokey Mountain of Yum Macaroni and Cheese
1/2 lb dry pasta noodles (elbow, wheels, penne, farfalle, whatever)
3 tablespoons flour
3 tablespoons butter
3 1/2 cups milk (I used 2%, which is about as low as I'd go as far as fat content)
3 1/2 cups Cougar Gold cheese, shredded (or any really good, high-quality melting cheese like gouda, raclette, Beecher's Flagship, Kerrygold Dubliner)
1/2 cup pancetta, diced and skillet-fried until crisp
1 4 oz can diced roasted chiles
1/2 tsp paprika
1/2 tsp garlic powder
1/4 tsp cayenne pepper
Salt and pepper to taste
Secret Aardvark Sauce

In a large pasta pot, boil salted water and cook noodles to package directions. Drain when the noodles are still al dente--cooked, but with a toothsome bite. They will cook for additional time during the bake. Reserve noodles, and keep the pasta pot handy.

In a deep-bottom saucepan over medium-high heat, melt the butter. Add the flour and whisk together, continuing to whisk until the mixture forms a golden-hued roux, about five minutes. Slowly add the milk, whisking constantly, and bring to a slow boil. As soon as the mixture begins to bubble (about an additional 5-7 minutes), remove from heat. Mix in 3 cups of the grated cheese, paprika, garlic powder, cayenne pepper and salt and pepper. Mix until the cheese has melted into the hot mixture.

Place the reserved noodles back into the pasta pot, then add the pancetta, chiles and cheese sauce. Mix thoroughly, then spoon into a 9"x9" casserole baking dish. Top the dish with Secret Aardvark to taste (my idea of a good spicy layer is 4-5 squirts of sauce, ensuring each scoop of macaroni and cheese served will have at least a few drops), and with the remaining 1/2 cup of cheese. Bake at 375 for 35 minutes, when it will be bubbling and too good to resist.

Sunday, July 8, 2012

Nameless Cuisine

There are so many food (and drink!) memories from Pacific. Breakfast at Maggie's Buns, the mysterious Grendel's Pasty, and the jalapeno popper rubber glove debacle. But of all the foodie memories in Forest Grove, most probably took place at Izgara. It's an odd little restaurant, not the kind you'd expect to find in a small town tucked between the coast, farmland and vineyard hills. It claims to serve middle eastern cuisine, which it does--falafel, shwarma, and some of the best house-made hummus I've ever tried. But there's some strange fusion going on, like the German-influenced chicken schnitzel pita wraps, and sizzling fries.

(They don't really sizzle, unfortunatley. They're just fries.And as a result, there's the strange addition of a ketchup bottle next to the baba ganoush).

Tonight, while I was trying to dream up a nice and refreshing dinner involving shrimp, I started thinking of my favorite residency restaurant. Vaguely middle eastern flavors mixed together just 'cuz they taste good. At Izgara, they bring out these tiny bowls of appetizer salads before the entrees. They are kind of random, like a really delicious corn salad and cole slaw, but when you mix them together on some naan bread they become a delectable Mediterranean-inspired nacho.

For our own strange smorgasbord I made a curry-scented carrot salad, chimmichurri, basic cole slaw and bought some tzatziki at Whole Foods. The shrimp were marinated in olive oil, balsamic vinegar, red pepper flakes, oregano, salt and pepper. Just a brief marinade, though--20 minutes or so--too much marinade for shrimp and they start to get gross. I skewered them and gave them a quick squirt of lemon at the very end. They grill up about as fast as the pitas do before they turn to rubber, so don't leave them alone. They hate to be alone. We assembled our own open-faced sandwiches, served with spiced couscous and fresh corn on the cob.

It didn't make a whole lot of sense, and I don't know what to call it exactly, but I can tell you it was light, bright and fresh for the first 90+ degree day of the year. And that's a win in any language.

Friday, July 6, 2012

Cherry Pie Futures

Most people's idea of a nice Friday night at home includes some take 'n bake pizza, the latest delivery from Netflix, a lot of couch and turning into contented goo in front of the TV.

When I came home tonight with twenty pounds of cherries, it was clear that this wasn't the kind of Friday we had in store.

Since we're in the thick of cherry season here in Oregon (happy 4th, ya'll!), prices are at their lowest and the produce is at its peak. It's the teeny window of time to buy copious amounts of the harvest and launch a preservation project. At only $1.49 a pound this week (down from about six times that the rest of the year), this was the moment to embark on the project I'd been wanting to do for several years: home-canned cherry pie filling. The recipe got bumped in 2010 because I had just started the MFA and I didn't have the foresight to order Clear Jell ahead of time, and last year this was right around the time I was saying "go to hell, Company Which Will Remain Nameless" and started the job search/interview/see ya process. This year, thanks to my can't-go-back-to-life-without-it Amazon Prime membership, the essential Clear Jell was on my doorstep in two days and I picked up 36 cups worth of cherries on my lunch break.

Clear Jell is a modified corn starch that thickens up like nobody's business. It produces more reliable, consistent results than standard cornstarch, and is available online from places like the aforementioned Amazon for not a lot of money. I've been unsuccessful in finding any at a retail store close by, though I'd suspect that Mirador Store would be a good bet if you're in Portland. Not to mention it's a fun trip out there.

So. Twenty pounds. Three of the biggest mixing bowls I could conjure. One cherry pitter. Shockingly, the project didn't take us as long as I'd feared. Switching between stemming and pitting duty, we finished in about an hour or so. The recipe I found on Simple Bites made only one quart, so I increased it four and five-fold for two separate, 4- and 5-quart batches. Once the cherries are all pitted, the batches actually go very quickly. The cherries get a quick blanche, and the sugar and Clear Jell, plus spices, cook up to a thick boiling slurry in less than ten minutes. I was delighted when we mixed together the cherries and sugar mixture, and it turned into what looked exactly like canned cherry pie filling... except it still tasted like real cherries and the fruit didn't look all fake and sad. I stole a few bites of the last batch, and I can testify that this isn't just a pretty canning face. I could look at these jars all day, yes, but the fresh, still toothsome fruit with the hints of cinnamon and allspice were divine. This would make some of the best waffle topping ever. Speaking of which, I need a waffle iron. One of the few things I never did invest in. Although that damn avocado peeler is still in the drawer.

Now that I've popped my canned pie filling cherry (ugh, sorry, I couldn't resist), there's no stopping me. There are so many fall and winter pies waiting to be filled! So much Clear Jell to order! The summer produce season has just barely started. Sterilize those jars, my friends. It's going to be one hell of a year.


Cherry Pie Filling Recipe from Simple Bites

  • 4 cups cherries
  • 3/4 cup sugar
  • 3 Tablespoons Clear Jel
  • 1 cup water
  • 1/4 teaspoon cinnamon
  • 1/8 teaspoon allspice
  • 2 Tablespoons lemon juice
Fill your water-bath canner with water and set to boiling. Make sure your jars are sanitized and heated.
Wash and pit the cherries. In a large nonreactive pot filled with boiling water, blanch the cherries for a minute, then drain. Pour the hot cherries into a bowl and cover.
In the same pot, mix together sugar and Clear Jel. Slowly add the water, whisking to help Clear Jel dissolve evenly. Don’t worry too much if it clumps up – it should dissolve as it heats up. Add the spices and heat over medium-high, until sugar and Clear Jel are dissolved and mixture is starting to bubble. Add the lemon juice and boil for about a minute.
Remove from heat and gently stir in cherries and any accumulated juices. Pour filling into prepared jar(s), wipe rim and set lid on top. Screw ring on finger-tight, and using a jar grabber carefully lower the jar into the water bath.
Process for 30 to 40 minutes. Remove and let rest on the counter until completely cooled. Any jars that have not sealed should be refrigerated and used promptly.


Sunday, July 1, 2012

Back in Culinary Commission

Between those magnificent February Thai enchiladas and this evening, I have been writing like crazy. My memoir thesis, food articles and book reviews, and some speeches. Unfortunately I've been away from my kitchen and my little foodie home online. Until graduation we were getting by on quesadillas, grilled chicken with a box of Zataran's rice, and take-out Chinese. I hate to admit to this sort of cooking slackery, let along blog about it.

Last weekend was graduation at Pacific University, where two years of reading, writing, editing, trashing terrible ideas, questioning the validity of my dreams versus talent, and meeting some of the most incredible humans in existence culminated in a ceremony--with hats and Harry Potter hoods!, some fantastic photo ops and a buffet dinner with all-you-can-eat shrimp skewers. When I came home Eats of Eden crossed my mind: am I going to bring back my blog? But I was feeling guilty about letting it go, like my yard right now with dandelions creeping in on my tomatoes. And while I ran out and rooted out those weeds as soon as I got home from the ten-day residency, I wasn't sure how to fix my writing hiatus. Was anyone going to come back and read? Should I really be blogging instead of writing the Next Great American Memoir Essay Incorporating the History of Food Preservation? So I kept quiet, and pretended the site didn't exist.

This weekend I got back into food. Between a business trip for Matt and my school stay, we hadn't been home together for almost a month. Whole Foods! Costco! Trader Joe's! Bags and bunches of card swipes later we had a pantry full of staples, a freezer full of protein, and a cache of homemade recipes we'd been craving. Last night, to combat last day of June cloudy gloominess, I made a big pot of scratch spaghetti sauce (in the gorgeous chicken-topped Staub pan that Matt got me for graduation!). Was it good? Oh god yes! After two weeks of restaurant and cafeteria food, even a jar of Ragu served in my own home would've been heaven. But really, it was yummy. But to blog? Again, the anxiety of opening up something I'd cruelly let die creeped in, and I kept my meal (and the leftovers) to myself.

This morning Matt woke up before me and once I was done sleeping in, I found him in the living room absorbed in a Good Eats seafood marathon. "We should have seafood," he said, the Alton Brown brainwashing complete. He suggested clam chowder, a treat we hadn't had aside from coastal town restaurant cups in ages.

"But we could do, like, a seafood medley!" I said, my wheels spinning like crazy, cooking ambition and creativity finally to spare. After ten billion pre-grad paninis, I felt like I was in a serious food rut.

We went to the Whole Foods fish counter, the best fish market I've found in Oregon. As we are not, unfortunately, in Seattle. I digress away from a seafood availability rant, however. Sweet baby scallops, wild dungeoness crab, fresh shrimp and clams: we spared no expense (literally; stupid-expensive checkout shock). I glanced at a Bon Appetit standards chowder recipe, but mostly just chose ingredients that sounded the right notes in my head: leeks, sweet corn, tarragon from the garden. I let the aromatics simmer for a few hours in fish stock, and in the last few minutes of cooking stirred in the cream and seafood. We sat down and raved at each other for our genius idea and execution.

"Have you taken a picture?" Matt asked.

"No."

"Aren't you going to blog about it?"

I could almost feel a blush coming on. "No, I don't think so."

"I don't know why. It's amazing."

Why wasn't I blogging? I began Eats of Eden over two years ago before starting the MFA program to work writing into a prominent place in my life. Now that I'm out of the program's structure, I need something to keep me motivated and engaged, and a nice break from the slog a long-form project (turning my thesis into a manuscript) can become. Not to mention a little justification for getting out the fancy dishes, the elaborate recipes, for slipping those special ingredient treats into my cart.

"I'll get the camera," I said.

Crustacean Nation Chowder--with clams!
2 tbsp butter
1 onion, chopped
1 leek, thoroughly cleaned and chopped
3 stalks of celery, chopped
3 cloves garlic, minced
1 bay leaf
1 tablespoon minced fresh thyme
1 tablespoon minced fresh tarragon
4 slices thick-cut bacon
1 can clams, juice reserved
3 cups fish stock
3 cups heavy cream
1 cup fresh or frozen corn
1/3 cup potato flakes
1/4 tsp cayenne pepper
1/2 pound baby scallops
1/2 pound shrimp, deveined and peeled
1/3 pound fresh crabmeat (or as much as you can afford! At $39.99 a pound at Whole Foods, we had to go a little light)
Tabasco to taste
2 green onions, thinly sliced
Salt and pepper

In a large soup pot or Dutch oven, melt the butter over medium-high heat. Add the bacon and cook until crispy, then remove and reserve, keeping the rendered bacon fat in the pan. Add aromatics: onion, leek, celery and garlic, season with salt and pepper, and saute until onions are translucent, 5-6 minutes. Stir in the juice from the canned clams and the fish stock and bring to a boil. Reduce heat down to a low simmer and add bay leaf, thyme, cayenne pepper, corn and tarragon, seasoning again with salt and pepper. Cover and allow to mesh together for at least an hour. About 20 minutes before serving time, raise the temperature to medium and slowly incorporate the cream. Add the potato flakes and stir, adding another dose of salt and pepper. Bring to a slow boil, then reduce back down to medium-low. Add baby scallops, bacon (crumbled), shrimp, crabmeat and clams. Stir and cook until heated through, about 5-7 minutes. Taste and add salt, pepper and Tabasco sauce to taste. Serve in bowls topped with green onions alongside Saltine or oyster crackers and crusty bread.

Saturday, February 18, 2012

The Pinterest Dinner Revolution

There are two revolutionary, world-altering developments that have taken place in my kitchen within the last couple of months:

1. We bought a rice cooker.
I had a rice cooker once before; a cheapie I brought with me to my dorm room in college. The rice tasted undercooked and gross, and when I moved into my first apartment it went in the trash. Over Christmas I got a few gifts I already owned from Costco, so I took them back and wandered the giant aisles for a worthy use of my store credit. Matt suggested a rice cooker, a nice digital one--even this upscale model was only $40, much less than most kitchen splurges I've indulged. We made white sticky rice the night we got it and...

OMG.

"Why have we been torturing ourselves all these years?" Matt wanted to know. No, stove-top rice isn't the same as gently steamed, happy grains. I should have known; every serious Asian cook I know has one. But we've branched out into cooking our own grainy blends in it (random rice pilafs): quinoa, vermicelli, couscous, whatever. With some chicken broth and herbs at the end, it's like my Wizard shortcut side dish maker.

2. Pinterest.

I'm sure you've probably heard about this new social media breakthrough. If not, maybe you should log off of Eats of Eden for a minute and go hit it up.

No, please stay here. I love you...

Anyway, Pinterest has been a total revolution in meal inspiration for me. Flipping through cookbooks doesn't work; I need a good chunk of time to get much out of them. Websites like Allrecipes or Epicurious are great if I know what I'm looking for, but just to browse, they're overwhelming. Pinterest displays pictures of food (and of course a million other things) in this clean, aesthetically-pleasing fashion that allows you to just absorb and be naturally drawn to what looks good. I haven't gone and followed every recipe I've tried on Pinterest to the letter, but I have used ideas to create new dishes.

Within the last week, I found myself liking and repinning this image: Thai Peanut Enchiladas. A pretty picture definitely helps (I wish I was a better food photographer! Maybe I should take a class). Thinking about the flavors, though, and I couldn't get it out of my head. Thai peanut! Mmm, savory, with just a hint of sweetness. Enchiladas! Damn I love enchiladas. So cheesy, and everything tastes good in a tortilla (don't believe me? Just ask KOIFusion).

The damn things wouldn't stop rolling around in my head. It was a craving for something I'd never even tasted: but I wanted to. How could this not be good?

I clicked through the picture to the recipe, and found a beautifully written recipe that went a little too deep for what I wanted to do tonight. First off, the peanut sauce was homemade. The batch was big, and I would probably mess up the sauce anyway. I am TERRIBLE at Asian sauces. The filling was very veggie-heavy, when I like a little more creaminess to my enchiladas. I took the basic concept and several of the ingredients, hit up Uwajimaya for a big bag of Japanese-style rice and a can of coconut milk (plus some bao for Matt; he loves the bao), and my dose of youthful nostalgia for my Sailor Moon-worshipping days.

I made a coconut rice in the rice cooker, which is as simple as cooking short-grain rice with one cup of coconut milk, two cups of water and salt. Parsley or cilantro is stirred in at the very end, after the rice has fully cooked. This would be my stand-in for traditional Spanish rice. I also stir-fried onion and bell pepper, melding curry and fajita favorites. The meat filling was similar to what I usually use: rotisserie chicken, sour cream, cumin and shredded cheese, but this time I added a hefty spoonful of Thai chile paste.

I bought a good-quality bottled Thai-style peanut sauce (use one that's similar to a dressing, not the thick Satay-style. And definitely don't use either Taste of Thai or Trader Joe's versions, because I've tried both and they're gross). The brand I used, which worked very well, is called Elki. I know I've seen it at Whole Foods and New Seasons, and I just bought it today at Uwajimaya. The right consistency for this type of dish, and a flavor that isn't bizarre. Seems I'm not the only one who can mess up sauces...

The peanut sauce was used just like you would enchilada sauce. A thin layer at the bottom of the pan, then drizzled over the enchiladas before they bake.

I thought these needed guacamole too. Avocado and peanut sauce? How wouldn't that work perfectly?

"I'm really skeptical about these enchiladas," I kept hearing from the living room. And I guess, who wouldn't be? I bet you're skeptical right now, thinking I'm out of my god-damn mind.

Well dear reader, go get yourself some peanut sauce, because this is the best thing I've made in 2012. Sorry cassoulet and souffle, I could eat these pretty much every day of the year. The peanut sauce is a bit like mole, marrying that sweet and savory line. The guacamole and tortilla makes your mind think Mexican, but then you get that coconut-infused rice and the red pepper, and your mind is officially blown.

"I'm so sorry I doubted you," Matt came around. "You could serve this. You could charge people and serve this. This is amazing."

Well, that would be awesome. But instead, I'll just hand you guys over the recipe and hope you believe me enough to try it. And follow me on Pinterest! Let's be inspired together.

(p.s. sorry for the craptastic picture. They may not be as pretty as the first pic, but I bet I win Chopped Mexican/Thai fusion basket edition).

Thai Peanut Enchiladas

1 batch of coconut rice, as described above
1 bottle good-quality peanut sauce
8 flour tortillas
1 cup of sour cream (plus additional 1/2 cup for topping--feel free to use light, I always do)
1 cup shredded cheese, your choice (I usually do a mix of mozzarella and sharp cheddar)
1 red bell pepper, julienned
1/2 onion, thinly sliced
1 1/2 tsp cumin
1 tbsp red chile paste
Juice of 1/2 lime
2 cups rotisserie chicken (either cooked and shredded, or from a rotisserie chicken from the store)
Vegetable oil
Guacamole for topping

Preheat oven to 375 and coat the bottom of a large Pyrex pan with approximately half of the peanut sauce. There should be a thin, but fully-covered, layer of sauce on the bottom of the pan.

Heat a tablespoon of oil in a pan. Add the onion and pepper and saute until softened, about 7 minutes. Transfer the mix to a plate and reserve. If necessary, add additional tsp oil to the skillet and warm chicken through. Turn off the burner and stir in the sour cream, cumin, lime juice and chile paste.

Assemble enchiladas by first adding approximately 1/3 cup of rice down the middle of the tortilla, then another 1/3 cup of chicken mixture, and top with 1/3 cup of pepper and onions (obviously just eyeball this; you want a decent amount of filling but don't pack it like a burrito). You should exhaust your supplies at eight enchiladas, which is the capacity of a Pyrex pan. Drizzle the enchiladas with remaining peanut sauce and top evenly with cheese. Bake for 18 minutes, then remove from the oven and add dollops of remaining 1/2 cup of sour cream. Bake an additional 5 minutes.


Serve with guacamole.

Tuesday, February 14, 2012

2012 Culinary Adventure February Edition - No Falling!

Happy Valentine's Day, all! I took a stand against VD on a Tuesday (what kind of bs is that?!), and held Valentine's Day Observed on Sunday. The menu read like this:

Crab Cakes with Sriracha Aioli
Herbed Rice Pilaf
Grilled Asparagus with Hollandaise
Chocolate Souffle

Astute Eats of Eden readers will recognize dessert as one of the 12 in 2012 adventures. I've never made a souffle; in fact, I didn't even own a souffle pan. I had to go to Sur La Table to get one; I forgot to register for that when we got married. Got distracted by the fondue pot. And note to anyone playing along at home: they don't sell souffle dishes at Target. Boo.

But see that raspberry-hued sexy digital Cuisinart mixer? That would be my Valentine's Day Observed present! It beat the whipped cream so fast and efficiently I almost overwhipped it into butter. But more on being whipped later.

I'd like to talk a smidge about the crab cakes, because they were fantastic. Since we weren't spending an obscene fortune at a sit-down restaurant for Valentine's Day dinner (bad service, sad little portions... BUT THERE'S A BALLOON ON YOUR TABLE! Yay...), I didn't feel bad buying a pound of lump crab or the really good chunk Callebaut chocolate at Whole Foods. I read about ten different recipes, and my end result was a hybrid of several techniques. I didn't want them to be too "busy" (Ina Garten's recipe) or too "bready" (the one in "Pure Foods"), but definitely flavorful with enough binder to keep the cakes together. The end result was a mix of cooked onion, breadcrumbs, Penzey's Cajun spice, mayonnaise, worcheschire and Tabasco. I used a 1/3 cup measuring cup to pack and shape the cakes, then let them take a long chill. Warm cakes disintegrate on the grill. If I were to do them again though, I'd add an egg to the mix. Several of my cakes died in the flipping process (a very thin, wide spatula is a MUST!), which made me crabby. But most kept it pretty much together, so it wasn't a total loss. Sriracha aioli (you could easily do just plain mayonnaise, too) is the perfect moist, spicy accompaniment to these meaty, slightly sweet cakes.

All right, enough expensive protein bragging. On to the adventure! I like to think that souffle is a healthy dessert, since it's primarily egg whites. I am probably delusional, so don't quote me. Especially since I had to melt down that lump of chocolate in my ghetto double-boiler, then mix with 3 egg yolks. My first experience with Callebaut was at the food distributor company, when I worked on making a manual on how to temper (melt) chocolate in the microwave. Yes, you can do it, but you can also make lasagna in the microwave. It doesn't mean you should. Gently melting over simmering water doesn't take that long, and keeps you in control of the chocolate.

The souffle itself is built on a foundation of whipped egg whites. They are whipped on their own until they form soft peaks. Judge how strong your peaks are by turning off the mixer and turning it upside down so the beaters stand up. If the tips immediately droop and seem soft, yep, soft peaks. If they're high and strong, you've got stiff peaks and the whole whipping portion of the recipe is probably about over. Then it's time to fold the chocolate into the egg whites. I hate this part, because it's like peeing in snow. Poor, pure egg whites! At least chocolate is delicious, even though it's the color of poo.

You have to stick it in the oven ASAP at this point, so the bubbles in the egg whites don't get tired and pop. We've all heard the stories of tragic fallen souffles, and I had no reason to think I stood any better chance of a successful souffle than anyone else. But maybe it's an urban myth, how fragile these dishes are. Because the dish took maybe 20 minutes to assemble, and though it wasn't a skyscraper of a puff like some pictures I've seen, it couldn't be described as "fallen." The dessert was deeply chocolatey but light--as Matt described it, "it's like a warm, fluffy brownie." He even went back for seconds, which is freakish because he doesn't even like dessert.

"There's lots of savory souffles too," I said, "cheese souffles..."

"Breakfast souffles?" He asked hopefully.

"Why yes, yes there are."

"We should try that this weekend."

Adventure success--encore requests!

Next month I'll be making my first Moussaka. Opa!! Until then, enjoy your Valentine's Day.

Chocolate Souffle
Originally featured in Gourmet magazine
  • 1/3 cup sugar plus additional for sprinkling
  • 5 oz bittersweet chocolate (not unsweetened), chopped
  • 3 large egg yolks at room temperature

  • 6 large egg whites
  • Accompaniment: lightly sweetened whipped cream
  • Special equipment: a 5 1/2- to 6-cup glass or ceramic soufflé dish
  • 1/3 cup sugar plus additional for sprinkling
  • 5 oz bittersweet chocolate (not unsweetened), chopped
  • 3 large egg yolks at room temperature

  • 6 large egg whites
  • Accompaniment: lightly sweetened whipped cream
  • Special equipment: a 5 1/2- to 6-cup glass or ceramic soufflé dish

Preheat oven to 375°F. Generously butter soufflé dish and sprinkle with sugar, knocking out excess.
Melt chocolate in a metal bowl set over a saucepan of barely simmering water, stirring occasionally until smooth. Remove bowl from heat and stir in yolks (mixture will stiffen).
Beat whites with a pinch of salt in a large bowl with an electric mixer at medium speed until they just hold soft peaks. Add 1/3 cup sugar, a little at a time, continuing to beat at medium speed, then beat at high speed until whites just hold stiff peaks. Stir about 1 cup whites into chocolate mixture to lighten, then add mixture to remaining whites, folding gently but thoroughly.
Spoon into soufflé dish and run the end of your thumb around inside edge of soufflé dish (this will help soufflé rise evenly). Bake in middle of oven until puffed and crusted on top but still jiggly in center, 24 to 26 minutes. Serve immediately.